Showing posts with label Super Side Dishes. Show all posts

Friday, June 20, 2014

Broccoli and Cauliflower Salad

I'm always looking for a good side dish to go with a hearty dinner. I absolutely LOVE broccoli salad, but sometimes feel like the large amount of mayonnaise and the red onion bother my stomach. This recipe has a little different dressing, still uses some mayonnaise, but I decided to substitute the red onion with sweet onion. SCORE! The recipe was based on Food Network's Melissa d'Arabian's recipe, I just added a few more ingredients and tweaked it a bit. Absolutely delicious! I hope you enjoy it too! To print recipe, click here:
Ingredients:
2-3 slices bacon, cut into small pieces, cooked
1 1/2 cups broccoli, cut into small florets
1 1/2 cups cauliflower, cut into small florets
1/4 sweet onion, chopped
1 large carrot, shredded (about 1 cup)
2 tablespoons sugar
1 tablespoon red wine vinegar
1 tablespoon Dijon mustard
2 tablespoons vegetable oil
1/4 cup mayonnaise
1/2 teaspoon Old Bay seasoning
Salt and pepper to taste
1/2 cup shredded cheddar cheese
Directions:
1) Cook bacon until nice and crispy. Once cooked, set aside on a paper towel lined plate to drain grease.
2) In a small bowl, whisk together the sugar, vinegar and Dijon mustard.  Add the vegetable oil and whisk. Then mix in the mayonnaise and Old Bay seasoning. Whisk well. Finally, season with salt and pepper.
3) Place the broccoli, cauliflower, onion, carrot and bacon into a large bowl. Toss well.
4) Pour the dressing over the vegetable mix and toss. Finally, add the shredded cheddar and mix well.
5) Chill for about 30 minutes before serving. Enjoy!
Copyright © 2014 Kellicipes
Nutrition Facts
Servings 4.0
Amount Per Serving
Calories 306
% Daily Value *
Total Fat 24 g37 %
Saturated Fat 6 g30 %
Monounsaturated Fat 9 g
Polyunsaturated Fat 8 g
Trans Fat 0 g
Cholesterol 27 mg9 %
Sodium 501 mg21 %
Potassium 370 mg11 %
Total Carbohydrate 15 g5 %
Dietary Fiber 3 g11 %
Sugars 10 g
Protein 8 g15 %
Vitamin A74 %
Vitamin C82 %
Calcium16 %
Iron4 %
* The Percent Daily Values are based on a 2,000 calorie diet, so your values may change depending on your calorie needs. The values here may not be 100% accurate because the recipes have not been professionally evaluated nor have they been evaluated by the U.S. FDA.

Tuesday, May 27, 2014

Pizza Stuffed Mushrooms


The man of the house always seems to amaze me! I bought Baby Bella Mushrooms because I thought he would like them for our burgers, as he always does. So when I walked in the kitchen to see how the burger prepping was going, I was surprised that instead of slicing the mushrooms with onions for the grill, he was prepping to stuff them. What?! Never thought he'd think of something so "gourmet" as that, lol! I asked him what he planned on stuffing them with and he said pepperoni and cheese. So I gave him a few suggestions and then let him go at it. A few minutes later, I went back into the kitchen and was amazed at what I saw...mushrooms in a muffin tin? Genius! We decided to bake them at 350°F for 20 minutes and then topping them off with some more cheese and bread crumbs. Delicious little things! Wow! Now, I'll share with you what I "thought" he used as far as measurements, but really, just use your own judgment, especially because mushroom sizes can vary. I hope you enjoy these as much as we did! To print recipe, click: Pizza Stuffed Mushrooms
Ingredients:
1-8oz package of Baby Bella Mushrooms
1/2 cup Shredded Cheese (We used Pizza Blend)
12-15 Slices of Pepperoni, finely chopped
1 1/2 tablespoons Garlic, minced
1 teaspoon Italian Seasoning
2 tablespoons Marinara sauce or Pizza sauce
2-3 tablespoons Bread Crumbs
1/4 cup Shredded Cheese (Again, we used Pizza Blend but Parmesan would be great too!)
Non-Stick Cooking Spray
Directions:
1) Pre-heat oven to 350°F. Clean mushrooms and remove stems. Using a small spoon, scoop out as much of the interior as you can, to allow room for the stuffing.
2) In a medium bowl, mix the chopped pepperoni, 1/2 shredded cheese, garlic, italian seasoning and marinara sauce.
3) Fill each mushroom with the mixture and place each mushrooms in a 12 cup muffin pan. Spray the top of each cup/mushroom with non-stick spray. Bake for 20 minutes at 350°F.
4) While mushrooms are cooking, in a small bowl, mix together the bread crumbs and 1/4 shredded cheese.
5) Once mushrooms have cooked for 20 minutes, remove from oven and top each mushroom with a bit of the bread crumb/cheese mixture. Bake for an additional 5-7 minutes.

6) Remove from oven, let cool for about 5-10 minutes, then ENJOY!
Copyright © 2013 Kellicipes

Saturday, May 10, 2014

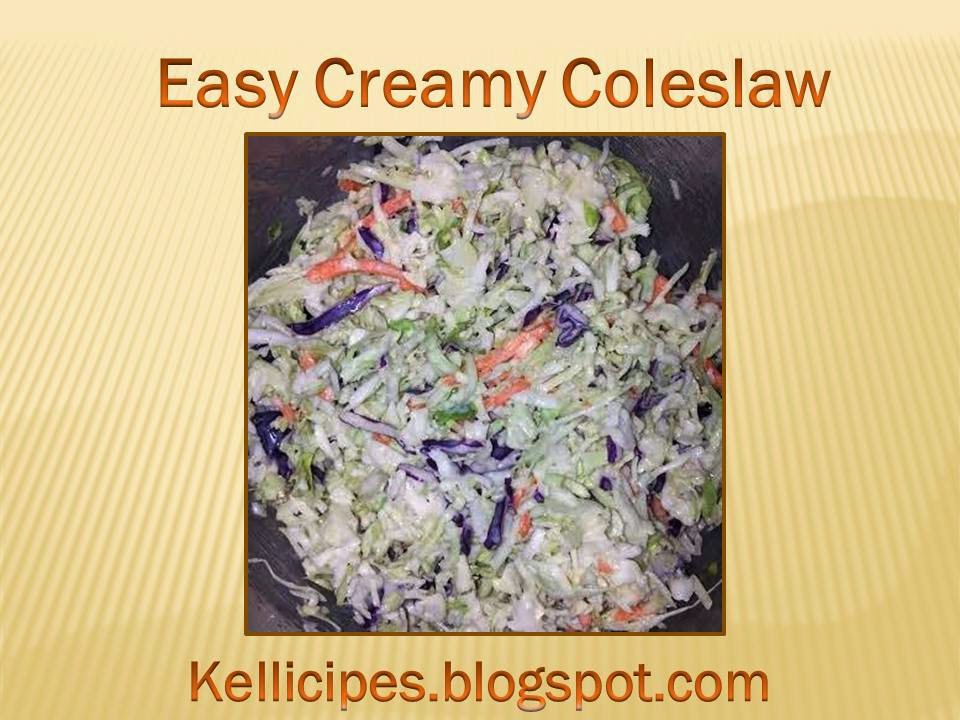
Easy Creamy Coleslaw

Store bough coleslaw is just not the same as when you make it yourself and to be honest, it really doesn't take more than 5 minutes to make (well, about an hour if you chill it). The proof of how awesome this coleslaw tastes is the comment made by one of our houseguests: "I hate coleslaw, it's disgusting. Ok, I'll try it..WOW! That's really good!". As my 5-year old nephew says, "Try it...you might like it!". I wish I could take credit for this simple recipe, but I can't. I found it on a site that featured one of Mr. Food's approved recipes: Mr. Food Coleslaw
The only thing I added was some freshly ground pepper. The key to this recipe is to make the coleslaw and then let it sit in the fridge for about an hour, so that the liquid ingredients soak up the slaw mixture. Just letting it sit for an hour lets the flavors blend beautifully. Hope you enjoy! To print this recipe, click here Easy Creamy Coleslaw
Ingredients:
1/2 cup mayonnaise
1/3 cup milk
1 teaspoon white vinegar
1/4 cup sugar
1/4 teaspoon salt
freshly ground pepper (use your judgment on amount)
1 (16 oz) package cabbage coleslaw mix ( I prefer the tri-colored mix, with carrots, cabbage and red cabbage)
Directions:
1) In a medium mixing bowl, combine the mayonnaise, milk, vinegar, sugar, salt and freshly ground pepper. Mix well with a whisk until creamy and smooth.
2) In a large bowl, add the packaged coleslaw mix, then pour the medium mixing bowl mixture on top of the coleslaw mix. Stir well, cover with foil or plastic wrap and chill in the fridge for at least an hour. **The mixture might not seem creamy just yet, that is why you have to chill it. Once chilled, it will be nice and creamy!**
3) Serve and enjoy! 
Copyright © 2013 Kellicipes

Hash Brown Casserole

Last night we had a barbeque, and it was AMAZING! Burgers, Hot Dogs, Corn on the cob, coleslaw and this super delicious Hash Brown Casserole! I apologize that the photo isn't the greatest, but please take my word for it, this stuff is ADDICTING! Feel free to double the recipe if you have a big crowd. This recipe fed four and looking back, I should have doubled it! To print the recipe click HASH BROWN CASSEROLE
Ingredients:
4 tablespoons butter (additional 2-3 tablespoons if needed, see step 3)
1 pound frozen hash browns (defrosted)
1/2 sweet onion, chopped
1 tablespoon vegetable oil
1 teaspoon garlic powder
1 teaspoon paprika
1 1/2 cups cheddar cheese
1 can cream of chicken soup (or cream of soup of your choice)
salt and pepper
scallions
Directions:
1) Preheat oven to 350°F. Chop onions.
2) In a large hot skillet, melt 4 tablespoons of the butter and add the onions. Cook the onions until they start to brown.
3) Add the defrosted hash browns and tablespoon of vegetable oil. Add the garlic powder and paprika. Cook the hash brown/onion mixture until the hash browns are brown and a bit crispy. You may want to split the mixture into two skillets if your mixture is not browning. I did this and just added 2-3 tablespoons of butter to the second pan before adding half of the mixture.
4) In a large mixing bowl, add the cheese and soup, mix together. Once the hash brown/onion mixture is cooked and crispy, remove from stove and add it to the large bowl with the cheese and soup mixture. Stir until all ingredients are combined. You can add some salt and pepper now or after the casserole is cooked. It's your preference.
5) Spray a 9"x13" baking dish with non-stick cooking spray. Pour the mixture into the baking dish and bake for 30 minutes. You may add more shredded cheddar to the top of the casserole if you like it super cheesy...like me!

6) Remove after 30 minutes and top with sliced scallions (green onions).  Let sit for about 5-10 minutes, then serve with sour cream or ketchup and ENJOY!
Copyright © 2013 Kellicipes

Friday, May 2, 2014

Brother's Tasty Summer Salad

I love my Brother and thought I knew pretty much everything about him...but I didn't. HE CAN COOK! While visiting him last month, he and his wife cooked up some delicious food! My favorite was this salad. I can't tell you how awesome it is! I would have never thought to put these ingredients together and so I am delighted to have experienced this dish and share it with you! Super easy and super delicious! Stay tuned for his awesome Tawook Grilled Cauliflower recipe! Click here for RECIPE
Ingredients:
2 Romaine Lettuce bunches/stalks, chopped
1 can Chick peas, drained and rinsed
1 can Corn, drained OR 1-2 cobs of Corn, grilled
1 cup fresh Cilantro, chopped
1 cup fresh Basil, chopped
1 cup Feta Cheese, crumbled
Dressing of your choice
Salt and Pepper if desired
Directions:
1) Chop your Romaine, Cilantro and Basil.  Toss together then set aside.
2) Drain the Corn and heat over medium heat on a skillet that has been sprayed with non-stick spray, cooking until corn is slightly brown. You can also grill your corn on the grill by wrapping it in foil.
3) Add the cooked corn and drained chick peas to the lettuce mixture.
4) Top with Feta Cheese and toss with your favorite dressing. You can add salt and pepper if desired. I like Italian, Greek or a Vinaigrette with this salad. Enjoy!
Nutrition Facts
Servings 4.0
Amount Per Serving
Calories 253
% Daily Value *
Total Fat 11 g17 %
Saturated Fat 6 g28 %
Monounsaturated Fat 2 g
Polyunsaturated Fat 0 g
Trans Fat 0 g
Cholesterol 33 g11 %
Sodium 747 mg31 %
Potassium 406 mg12 %
Total Carbohydrate 26 g9 %
Dietary Fiber 5 g22 %
Sugars 4 g
Protein 13 g26 %
Vitamin A7 %
Vitamin C122 %
Calcium4 %
Iron177 %
* The Percent Daily Values are based on a 2,000 calorie diet, so your values may change depending on your calorie needs. The values here may not be 100% accurate because the recipes have not been professionally evaluated nor have they been evaluated by the U.S. FDA.
Copyright © 2013 Kellicipes

Sunday, April 6, 2014

Super Easy Pasta Salad

This is such an easy lunch or dinner to whip up and you can really let your imagination go with the ingredients. Our favorite is to use vegetable rotini pasta, cooked chicken, chickpeas, a veggy mix of some sort, italian dressing and parmesan cheese. Here's how it goes, to print the recipe, click here: Super Easy Pasta Salad
Ingredients:
1 box of vegetable rotini pasta
1 can of chickpeas, drained
1 bag of frozen steamfresh vegetables (we used Birds Eye Steamfresh Asian Medley)
1 small can sliced black olives
2-3 boneless chicken breasts, cooked and cubed
About 1 1/2 cups of Fat Free or Lite Italian dressing (regular Italian has too much oil)
1 cup grated parmesan cheese or cheese of your choice
Directions:
1) Season chicken breasts and cook on a non-stick medium sized pan, about 4-5 minutes per side until no longer pink in the middle. Remove from pan, cut into 1 inch cubes and set aside.
2) Cook pasta according to package, drain and return to large pot.
3) Microwave the frozen vegetables and drain the chickpeas and olives. Once vegetables are cooked, add them, the chickpeas, olives and cubed chicken to the pasta. Mix well.
4) Add the italian dressing...use as much or as little as you like. Toss well.
5) Add the parmesan cheese or your choice of cheese and mix well. Serve and Enjoy, it's that simple!
utrition Facts
Servings 8.0
Amount Per Serving
Calories 450
% Daily Value *
Total Fat 9 g13 %
Saturated Fat 3 g13 %
Monounsaturated Fat 1 g
Polyunsaturated Fat 0 g
Trans Fat 0 g
Cholesterol 63 g21 %
Sodium 610 mg25 %
Potassium 329 mg9 %
Total Carbohydrate 56 g19 %
Dietary Fiber 6 g22 %
Sugars 4 g
Protein 37 g75 %
Vitamin A0 %
Vitamin C22 %
Calcium2 %
Iron104 %
* The Percent Daily Values are based on a 2,000 calorie diet, so your values may change depending on your calorie needs. The values here may not be 100% accurate because the recipes have not been professionally evaluated nor have they been evaluated by the U.S. FDA.
Copyright © 2013 Kellicipes